This is one of my favourite spaces to share our new branding and website launches, along side some fantastic business information.
Integrating Flodesk with Showit for High-Converting, Designer-Quality Websites
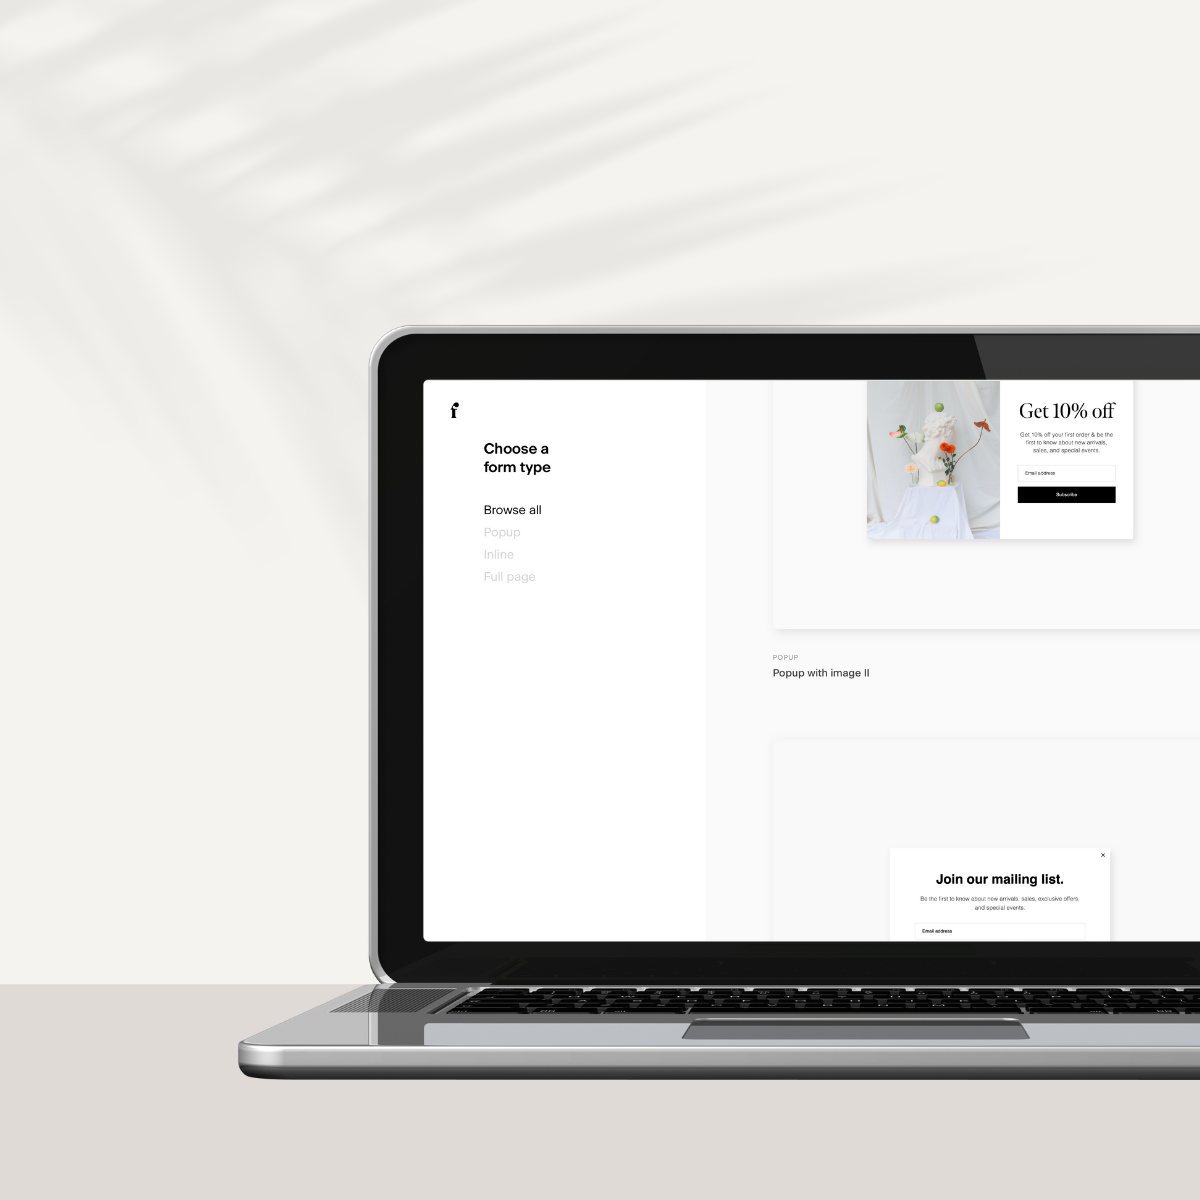
Flodesk offers affordable, transparent pricing that scales with your subscribers. Get 25% off your first year with my code GILLIAN at this link
Let’s get straight to the point: your website is your digital home, and your email list is the most valuable asset inside. While social media algorithms change on a whim, the connection you build through email is one you truly own.
If you’re using Showit for its incredible design freedom, you already know the power of a stunning website. But a beautiful site needs a beautiful way to convert visitors into community.
Enter Flodesk, the aesthetic game-changer in email marketing. It lets you create forms and emails that look like high-end magazine spreads, finally pairing stunning design with smart strategy.
When you combine the drag-and-drop genius of Showit with the design-first approach of Flodesk, you get a power couple ready to skyrocket your business.
In this guide, we’re walking through every single step of integrating Showit and Flodesk. We’ll cover embedding forms, mobile optimization secrets, and the code hacks you need to make it all work perfectly. Ready to build your passive income engine? Let’s dive in!

Setting the Foundation
Most people skip this step. They rush to grab that embed code, paste it onto their site, and then they’re left scratching their head, wondering why their form looks totally wonky or, worse, why their new subscribers aren’t getting that freebie they were promised! We are building a system that works on autopilot, and to do that, we need to set the stage right in Flodesk first. The “Segment” First Mentality (It’s a Game Changer!)
Flodesk is different. It’s not like those old-school systems. We aren’t dealing with “lists” here; we’re using Segments. Think of segments like the chic little organizational buckets of your email list. The best part? One subscriber can happily live in multiple buckets without you being charged twice. Winning!
Before you even think about creating a form, you need to know exactly where these new people are headed. Ask yourself:
- Are they signing up for your general newsletter?
- Are they downloading your specific, must-have freebie?
- Are they joining the exclusive waitlist for your new course?
The entire beautiful architecture of your email marketing depends on this segmentation. If you just lump everyone into a generic “Newsletter” segment, you lose the ability to speak to them about the things they actually care about. And that, my friend, is a missed connection!
Action Step: Create a hyper-specific segment for every single unique form you plan to build.
Naming Convention Tip: Use names that are so clear, they practically jump off the screen, like “Freebie – SEO Checklist,” “Waitlist – Web Design Course VIPS,” or “Lead Magnet – 5 Day Challenge.” Trust me, your future self will thank you when you’re setting up those workflows!
The Naked Form Strategy
One of the biggest mistakes I see is designing the entire form inside Flodesk. When you use Showit, you have the most powerful design tool at your fingertips. You don’t need Flodesk to render your background images, your headers, or your “Join the Club” text. In fact, if you do that, you might hurt your mobile responsiveness because Flodesk’s design scaling is different from Showit’s.
The Golden Rule of Showit + Flodesk: Let Showit handle the design. Let Flodesk handle the input fields.
We want to create what we call a “Naked Form” in Flodesk. This strategy ensures that your form blends seamlessly into your website design. Whether you change your website’s background color next week or swap out a photo, you won’t have to log back into Flodesk to update the form. It just works.
| Feature | Handle in Showit | Handle in Flodesk | Why? |
| Headlines | Yes | No | Showit offers better font control and SEO (Google reads Showit text better than embedded iframe text). |
| Backgrounds | Yes | No | Showit backgrounds are responsive; Flodesk backgrounds can clash with your site theme. |
| Input Fields | No | Yes | You must use Flodesk’s inputs to capture data securely. |
| Submit Button | No | Yes | The button is part of the form functionality and must be styled in Flodesk. |
| Images | Yes | No | Showit images are optimized for speed and layout; Flodesk images in forms can be clunky. |
The Double Opt-In Decision
In your form settings, you will see an option for “Double Opt-In.”
- Yes: The user gets an email asking them to confirm they want to subscribe.
- No: They are added immediately.
My Recommendation: For lead magnets (freebies), I usually toggle this OFF or customize the double opt-in email heavily. Why? Friction. You want that freebie in their hands fast. However, if you are in Europe or strict GDPR zones, you need to be careful with compliance. Flodesk handles this beautifully with customizable double opt-in emails that don’t look like robot spam.
Method 1: The Inline Form
To get your email list going, the “Inline Form” method is the standard way to integrate Flodesk right into your Showit site. An Inline Form is a friendly, persistent prompt, it lives permanently on your page (such as the footer, sidebar, or a dedicated spot in a blog post) and consistently encourages your visitors to join your community.
Steps to Create the “Ribbon” Form
- Start in Flodesk: Go to your account and navigate to Forms > + New Form.
- Choose the Type: Select Inline.
- Pick a Template: Select the Ribbon Banner template.
- Tip: This is the simplest foundation, and since you will be styling it in Showit, starting simple saves time.
- Assign a Segment: This is important! Choose the correct Segment (like “Newsletter” or the name of your specific “Freebie”).
Stripping the Design (The “Naked” Technique)
Now, we deconstruct the template to make it Showit-ready.
- Delete the Text: Click on the header text (“Subscribe to my list”) and delete it. Delete the subtext too. We will add these in Showit using your brand fonts.
- Background Transparency: This is crucial. Click the background of the form (not the fields, the canvas behind it). On the right-hand sidebar, under “Canvas Color” and “Background Color,” select the circle with the red diagonal line. This makes it transparent. If you leave it white, you will have a white block interrupting your beautiful Showit design. Transparency allows your Showit texture or color to show through.
- Style the Fields: Click the input fields (Name/Email). Match the font family to your website’s body font (or a standard web-safe font like Helvetica/Georgia if your custom font isn’t available in Flodesk). Set the border color and fill color. I love a clean, single-line border with a transparent fill for a modern look.
- Style the Button: Make this pop! Use your brand’s accent color. Ensure the text (“Download,” “Join,” “Gimme!”) is legible.
The Code Handoff
Once your form looks like a floating set of fields on a checkerboard (transparent) background, hit Next.
- Double Opt-In: Choose your preference.
- Notify Me: Do you want an email every time someone signs up? (Fun at first, annoying when you get 50 a day. Toggle off if you are scaling).
- Success Message: You have two choices here:
- Display a success message: “Thanks! Check your inbox.”
- Redirect to a URL: This is the “Pro” move. Redirect them to a custom “Thank You” page on your Showit site. This keeps them on your site longer (good for SEO) and allows you to present a “Tripwire” offer or upsell immediately.
Click Embed. You will see two boxes of code:
- Header Code: A snippet of JavaScript.
- Inline Code: A snippet of HTML.
STOP! Do not close this tab. You need both.
Embedding in Showit
Head over to your Showit app. This is where the magic happens.
The Header Code:
The Header Code is the same for every Flodesk form and only needs to be loaded once for the forms on your site to work. Therefore, adding it site-wide makes the most sense as it eliminates the need to paste the Header Code into the Custom Head HTML of every individual page.
Site-Wide Integration
If you are using the form in a Site Canvas (like a Footer or an Exit Popup) that appears on multiple pages, or even adding different forms to different pages, the best way to handle the header code is to use the Showit Global Custom Code function.
- Open your Site Settings (at the bottom left).
- Go to the Integrations tab.
- Click + Add Custom Code.
- Name your code (e.g., “Flodesk Header”).
- Choose where to Add Code To… (e.g., </head> for the Flodesk header code).
- Paste the Header Code here.
- Under Site Canvas Sets, choose the sets that contain your Flodesk form.
The Inline Code:
- Navigate to the Canvas where you want the form.
- In the bottom toolbar, click the little square icon (Embed Code).
- A black/gray box will appear. Double-click it.
- Paste the Header Code (yes, again, just to be safe if you didn’t do the page header step) AND the Inline Code right below it.
- Wait, both? Yes. Flodesk’s official help documents and designers often recommend pasting the Header code first, then the Inline code immediately after, inside the same Embed Widget. This ensures the script fires right where the form is.
- Click Save.
ARVE error: Invalid datetime: 2021-21-11
Positioning and Mobile Tweaks
You will see your form render in the box (if you’ve also added the header code to your embed code, otherwise you will only see the form in “preview” mode). Now, the fun part, designing around it.
- Resize: Drag the handles of the Embed box to fit the form. If it looks cut off, make the box taller or wider.
- Add Text in Showit: Use Showit’s text tool to add your “Sign up for the newsletter” header above the embed box. This ensures Google can read your header text (SEO win!) and it matches your site perfectly.
- Mobile View: Switch to the Mobile view in Showit. The form might look squished or huge. Resize the embed box on the mobile canvas.
Pro Tip: Flodesk forms are responsive, but sometimes they stack (Name on top of Email) on mobile and sit side-by-side on desktop. Ensure your Showit canvas has enough height on mobile to accommodate the stacked version without overlapping the footer.
The Pop-Up (High-Risk, High-Reward)
Pop-ups are controversial. Some people find them annoying. But the data doesn’t lie: they convert. If you have a killer lead magnet, a pop-up is the fastest way to get eyes on it.
Configuring the Pop-Up in Flodesk
- Go to Forms > + New Form > Pop-up.
- Choose a template: I love the ones with an image on the left and text on the right, they feel like a magazine feature, not a spam box.
- Behavior Settings: This is where you avoid being “that” annoying website. Choosing when to display your pop-up is important. “Immediately” is aggressive. “After 10 seconds” or “When visitor scrolls 30%” is better. “Exit Intent” (on desktop) is the gold standard, it only shows when the mouse leaves the browser window. Also keep an eye out for frequency. “Don’t show again to the same visitor for 7 days.” Please, I beg you. Do not show it every single time I refresh the page.
Installing the Pop-Up Code
Pop-ups don’t live on a specific canvas. They float over the site.
- Get the Header Code from Flodesk (Pop-ups only have header code, no inline code).
- In Showit, go to Site Settings (if you want it on every page, but please don’t put it on every page) or the specific Page > Advanced Settings > Custom Head HTML (if you only want it on the Blog or Home page).
- Paste the code. Save. Publish.
The “Fake” Pop-Up Strategy (Showit Exclusive)
If you want total design control that Flodesk’s pop-up builder doesn’t give you, you can build a “Showit Pop-Up.”
- Create a blank Canvas in Showit.
- Set it to Window Height and Sticky to Top.
- Set it to Hidden to Start.
- Design your pop-up (Background, Image, Text).
- Embed a standard Flodesk Inline Form (stripped naked) inside this canvas.
- Trigger this canvas to appear using a specific action (like clicking a button) or use Showit’s scroll actions so it pops-up when a user reaches a specific section of the page.
Why do this: It allows you to use custom fonts and specific Showit animations that Flodesk’s native pop-up can’t support.
Why NOT do this: You cannot set a frequency action, so it will show every time a user gets to that canvas on the page. Even if they have already signed up or visited that page before. You can’t turn it off.
Linking & Landing Pages
Sometimes, you don’t want a form on the page. Maybe you want a clean “Link in Bio” page for Instagram, or a button in your menu that says “Free Guide”.
The “Full Page” Form
Flodesk offers a Full Page form type. This is essentially a standalone landing page hosted by Flodesk.
Pros: Zero coding. You just design it in Flodesk and get a URL (e.g., myflodesk.com/freebie).
Cons: The URL isn’t your domain (unless you use a redirect), and you don’t have complete design control over it like you would in Showit.
How to connect it:
- Build the Full Page form in Flodesk.
- Copy the URL.
- In Showit, click your button (“Get the Guide”).
- Go to Click Actions on the right sidebar.
- Set Type to URL.
- Paste the Flodesk link. Open in New Window? Usually yes, so they don’t lose your site.
The “Pretty Link” Redirect
If you want the link to look professional (e.g., www.yourdomain.com/freebie instead of flodesk.com/x8d7f), use a Showit page.
- Create a new page in Showit named “Freebie.”
- Design it nicely.
- Embed a Flodesk Inline Form on that page.
- Now, share your yourdomain.com/freebie link everywhere. This drives traffic to your site, not Flodesk’s server. It will stay on brand and you will have total design freedom over it.
Advanced Customization & Troubleshooting
Here is where we get technical. If you are reading generic blog posts, they usually stop at “paste the code.” But what happens when things break? Or when you want to get fancy?
The “Multiple Forms on One Page” Glitch
This is a known issue that drives designers crazy. If you try to embed the same Flodesk form on the same page twice (e.g., one in the sidebar, one in the footer), one of them often disappears.
The Reason: HTML IDs must be unique. Flodesk’s code snippet uses a specific ID for the form container. If you paste the same code twice, the browser gets confused because it sees two elements with the same ID.
The Fix:
You need to manually edit the code for the second form.
- Paste the code for the second form.
- Look inside the code for the <div> ID and the script source ID.
- Add a random string of characters (like -2 or -sidebar) to the ID in two places the div id=”fd-form-…” shows up.
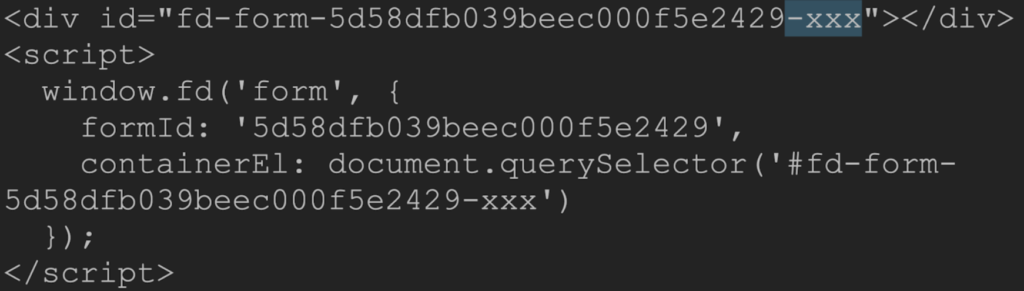
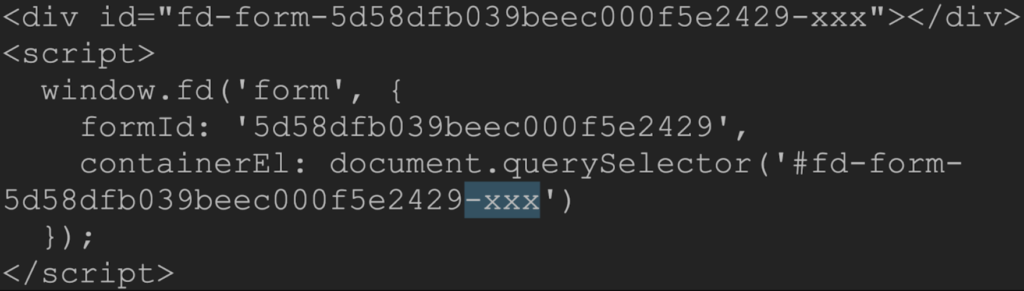
Alternative: Just create a new form in Flodesk (duplicate the first one). A new form generates a unique ID automatically. This is the “no-code” solution and honestly, it’s safer.
Mobile Responsiveness: Stacking vs. Scaling
Flodesk forms are responsive by default. However, Showit is absolute positioning.
The Problem: You make the embed box 400px wide on Desktop. On Mobile, 400px is wider than the screen. The form gets cut off.
The Solution: You must resize the Embed Widget on the Mobile View in Showit independently. Drag it to fit the mobile width (usually 320px).
This is another reason why I recommend adding the text around your form directly in Showit, so you can adjust it for mobile. Anything that automatically resizes for mobile is a no from me.
Linking to a “Hidden” Canvas (The Click Trigger)
You want a button that says “Subscribe” and when clicked, a form pops up over the current page, rather than taking them to a new page.
- Create a Canvas in Showit. Add your Flodesk Embed.
- Set Canvas Type to Window Height.
- Set Position to Hidden to Start.
- Set Sticky to Top.
- On your “Subscribe” button, go to Click Actions.
- Set Type to Show Canvas. Select your hidden canvas.
Crucial: On the hidden canvas, add a “Close” icon (an X). Link this icon to Click Actions > Hide Canvas > This Canvas.
Why we love this: It keeps the user on the page, feels premium, and loads instantly.
The “Set It and Forget It” Workflows
You added the form. Great! But what happens when they sign up? If they get silence, you’ve lost them.
The Delivery Workflow
- Trigger: “Subscriber is added to Segment.”
- Action: Send Email.
- The Content: “Hey! Here is that guide you asked for.” Include a button linking to the PDF (hosted on your Media Library in Showit or Google Drive).
- The Nurture: Do not stop there. Add a “Time Delay” of 2 days. Then send an email introducing yourself. Then another 2 days later sharing your best blog post. This is how you build trust on autopilot.
For more about Flodesk Workflows, check out this post
The Redirect Strategy
In the Flodesk form settings, utilizing the “Redirect to URL” after submission is a powerful tool for analytics.
- Create a page in Showit called /thank-you-newsletter.
- Install your Facebook Pixel or Google Analytics conversion event on that specific page.
- Now, when someone signs up, they land there, and your ad manager counts it as a conversion. You can’t track that easily if you just use a text “Success” message.
Troubleshooting: Why Is My Form Broken?
Even the best of us hit a wall. Here is your cheat sheet for when things go wrong.
| Issue | Potential Cause | The Fix |
| Form not appearing | Forgot Header Code | Ensure the Header Code is in the Page HTML or the Embed box alongside the inline code. |
| Form cut off on Mobile | Embed Box too small | Go to Showit Mobile View and drag the Embed widget handles to be taller/wider. |
| Two forms, only one shows | ID Conflict | Use the “String Hack” (Section 7.1) or create a duplicate form in Flodesk to generate a unique code. |
| Background isn’t transparent | Flodesk Setting | Go to Flodesk > Form > Style. Click the background. Select the circle with the red line (Transparent). |
| Form looks huge/tiny | Scaling | Check the font size in Flodesk. Showit scales the embed as an image preview, but the browser renders the code. Preview the live site to see the real size. |
| Pop-up won’t go away | Frequency Settings | You likely set it to “Show always.” Set it to “Hide for 7 days” after closing. |
Conclusion: Consistency is Queen
Building a website that works for you is a journey, not a sprint. By integrating Flodesk with Showit, you aren’t just stitching two pieces of tech together; you are creating a cohesive brand experience. You are telling your audience, “I care about the details. I care about design. And I care about you.”
Remember, the goal isn’t just to have a form. The goal is to build a relationship.
- Keep it simple: Don’t ask for their phone number, blood type, and mother’s maiden name. First name and Email are enough.
- Keep it on-brand: Use your fonts, your colors, your voice.
- Test everything: Sign up for your own list. Check it on your phone. Check it on your iPad. Make sure that freebie actually arrives.
You have the tools. You have the “fail-proof” guide. Now, go build that list and start owning your audience.
You’ve got this!
Flodesk offers affordable, transparent pricing that scales with your subscribers. Get 25% off your first year with my code GILLIAN at this link
Flodesk x Showit FAQ
This is usually because the “Embed Code” box in Showit is smaller than the form itself. Switch to Showit’s Mobile View and drag the handles of the embed box to make it taller and wider until the full form appears.
t’s up to you! Double Opt-in (sending a confirmation email) results in a higher quality list because it prevents spam bots, but it adds friction for real humans. If you are delivering a freebie, I usually recommend turning Double Opt-in OFF so they get their download instantly, but make sure you check your local laws (like GDPR in Europe).
Yes! In Flodesk, you can choose from a massive library of web fonts. If your specific custom font isn’t there, pick a standard one (like Helvetica or Garamond) that complements your brand, or use the “Naked Form” strategy where you type the headers in Showit and only use Flodesk for the input boxes.
Flodesk forms are responsive. If you embed a form with an image into a small container (like a sidebar), Flodesk automatically hides the image to save space. To fix this, you can toggle “Image on Mobile” in the Flodesk form settings, or simply widen the embed box in Showit.
If wiring up embed codes isn’t how you want to spend your week, a Showit developer can handle the integration — and the rest of your site — for you.
Leave a Reply
Free, takes about half an hour, and you can leave the list whenever you like.
37 words and phrases that give AI copy away, plus the twenty minute fix for the most important line on your site.
January 19th, 2022 at 12:07 pm
[…] first place, so these have to look attractive and inviting. Remember, people will spend their time filling out the form and giving up their email addresses. You’ll turn potential subscribers off if you’re not […]