This is one of my favourite spaces to share our new branding and website launches, along side some fantastic business information.
The Ultimate Design Business Tech Stack (What I Use + Why It Works)

Let’s be real, running a creative business means juggling a million things: design work, client communication, sales funnels, content creation, and the occasional “wait, did I send that invoice?” moment. Sound familiar?
After years of building templates, launching offers, and helping creative entrepreneurs craft beautiful brands, I’ve learned that having the right tech stack is like hiring a dream team of virtual assistants. Tools that don’t just look pretty, but actually save you time, make you money, and help you show up with confidence.
In this post, I’m giving you an unfiltered, ultra-detailed look at the platforms and programs I use every single day to run Gillian Sarah. I’ll walk you through:
- My full website and design setup
- How I automate emails, payments, and client onboarding
- The design tools I swear by (yes, including Canva)
- My course + checkout stack for digital products
- And the real-life hardware I use to bring it all to life
Whether you’re just starting your business or you’ve been around a while but want to streamline things and scale, this guide is packed with resources, ideas, and affiliate links to tools I genuinely use and love.
Ready to upgrade your systems and simplify your workflow? Let’s dive in.

Why I Use Showit to Power My Entire Website Business
When people ask what platform I recommend for creative business owners, my answer is always the same: Showit.
It’s the foundation of my entire brand and the reason I’ve been able to build a profitable, design-driven business without relying on developers. Whether I’m designing full-scale custom blogs, or building website templates, Showit gives me complete creative freedom with zero coding required.
Let me walk you through exactly why I love it, how I use it, and how it can work for you too.
What is Showit and Why Is It So Different?
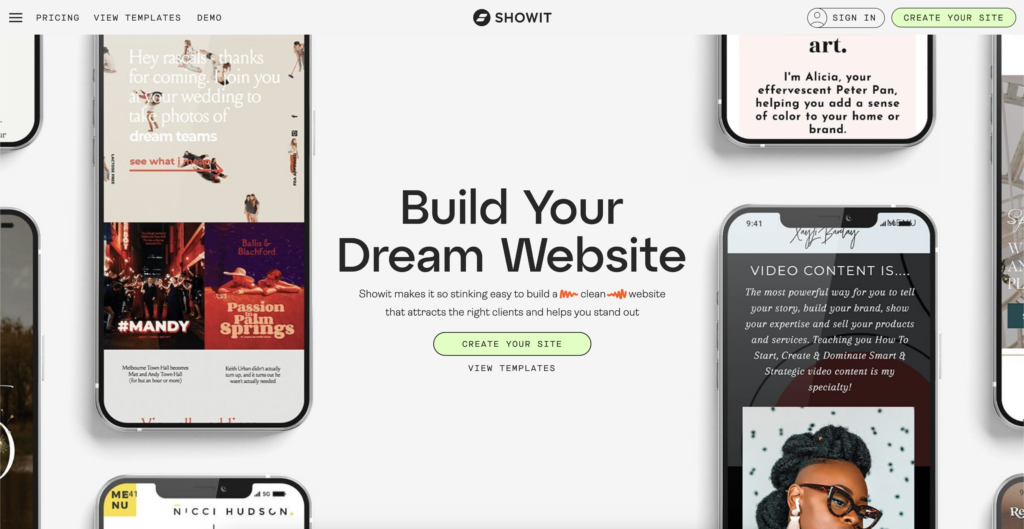
At its core, Showit is a drag-and-drop website builder made specifically for visual creatives. Unlike WordPress or Squarespace, Showit gives you full control over every element on the page. You can move things exactly where you want them, layer text and images, and create a design that feels completely unique.
The best part is that you don’t need to write a single line of code (if you don’t want to).
How I Use Showit in My Business
1. Building Custom Projects for Clients
I use Showit to deliver fully custom websites for bloggers and content creators. The platform allows me to match their exact visual style, without relying on developers or external tools.
This makes my project timelines faster, more affordable for the client, and easier for them to maintain once the site is handed over.
2. Designing Website Templates
My entire template shop is built with Showit. Every single one of my customizable templates, from minimalist portfolios to bold sales pages, is designed directly in the Showit builder. Because it’s so flexible, I can create unique layouts without worrying about restrictive frameworks or clunky code.
When a customer purchases a template, they receive a beautiful, mobile-responsive website they can launch quickly. I get fewer tech support emails, happier customers, and a product that consistently sells.
3. Creating Landing Pages, Sales Pages, and Funnels
Showit is also my go-to for creating stand-alone landing pages, opt-ins, and high-converting sales pages that connect to other platforms like Flodesk and ThriveCart.
Because I can design every detail, I’m not limited by rigid templates. Each page is fully branded, strategic, and conversion-focused.
My Favorite Showit Features
- True drag-and-drop flexibility
- Desktop and mobile views side by side for easy responsive design
- WordPress blog integration for better SEO and content control
- Simple embedding for forms, checkout buttons, and external tools
- Canvas system for building reusable design blocks
- Creative freedom with no code required (but the option to add code if needed)
How Showit Helps Me Sell Templates at Scale
One of the biggest reasons I love Showit is that it allows me to scale my business by selling templates.
Because Showit lets you export and share designs, I can create a product once and sell it over and over again. My template shop runs on this model, and it’s what makes this part of my business so sustainable.
Plus, my customers don’t feel intimidated when they open the builder. Showit is intuitive, clean, and easy to navigate, even for people who aren’t tech-savvy.
Who Should Use Showit?
I recommend Showit if you:
- Are a designer, photographer, coach, or personal brand who wants a site that reflects your aesthetic
- Want a beautiful, custom-looking site without hiring a developer
- Plan to design and sell templates or digital products
- Prefer visual tools over tech-heavy platforms
- Want a flexible site builder that integrates with your email and checkout systems
Worth saying: I also build custom Showit sites for clients, so if you love the look of Showit but would rather not learn it from scratch, that’s an option too.
Getting Started with Showit
If you’re ready to explore Showit, they offer a free 14-day trial so you can test the platform and start designing. I suggest starting with a template (I have plenty in my shop) and then customizing it to fit your brand and goals.
Try Showit for free here
(This is my affiliate link. If you sign up using it, I may earn a small commission at no extra cost to you. Thank you for supporting my business!)
How The Canvas Builder Helps Me Create Showit Templates Faster
Designing a website from scratch every time? Not a chance.
One of my favorite time-saving tools as a designer is The Canvas Builder. If you’ve ever felt stuck staring at a blank Showit screen or wished you could drop in a ready-made section that actually fits your brand, this tool is the solution.
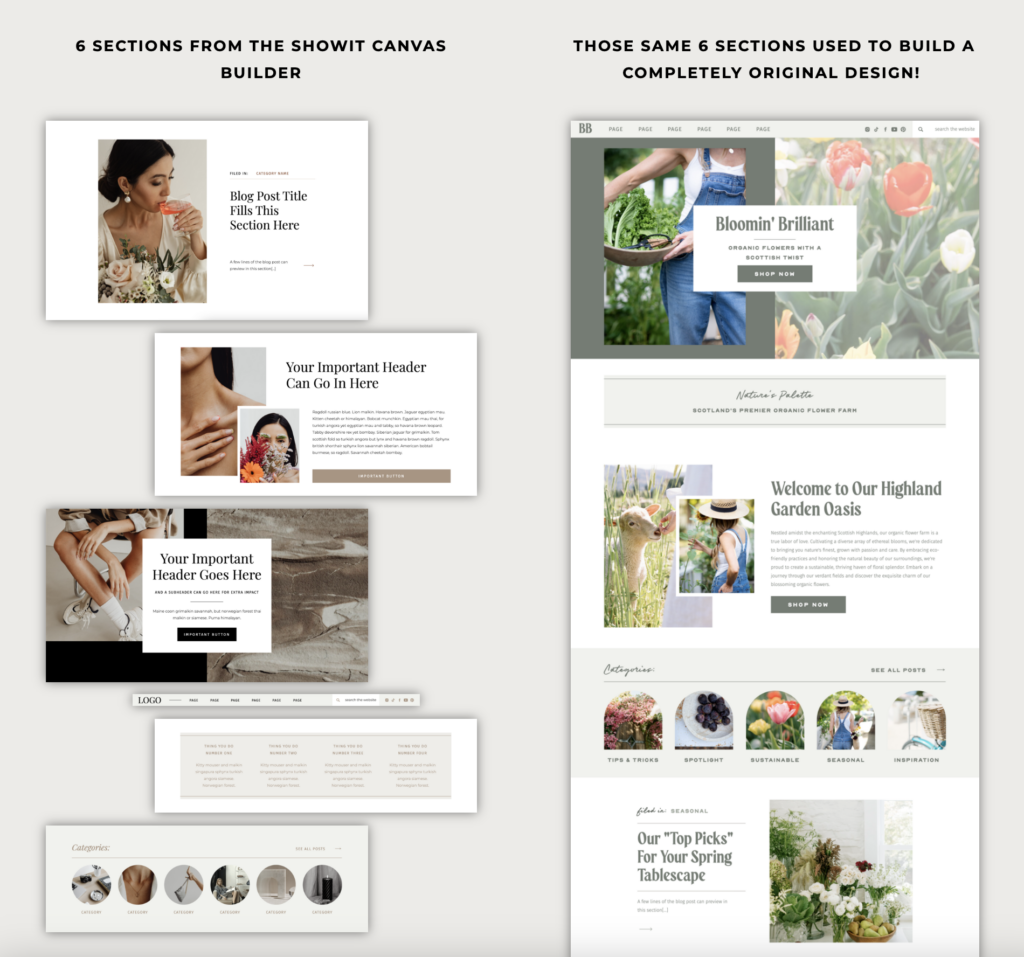
The Canvas Builder is a content library designed specifically for Showit users. It gives you a collection of pre-styled canvases, everything from hero sections to testimonials and pricing layouts, that you can drag into your project and customize in just a few clicks.
Why I Use The Canvas Builder in My Workflow
Because I create and sell website templates, I need to move quickly while keeping everything polished and on-brand. The Canvas Builder lets me do exactly that.
Here’s how it fits into my process:
- I start by choosing the type of page I’m building. That could be a homepage, about page, or sales page.
- Then I browse the canvas library and pick out the layouts that match the structure I’m going for.
- I drop them into my Showit project, update the fonts, colors, and content, and I’m done.
Of course some bits and pieces are moved around and restyled. This allows me to build full pages or entire templates in a fraction of the time it would take to start from scratch. It keeps my designs consistent, responsive, and aligned with my overall style.
I also offer semi-custom website designs with this tool. Where I can build websites for clients out of pre-existing canvases in a matter of days or even hours. This is a great option for offering more affordable website projects to clients.
What’s Inside The Canvas Builder
The Canvas Builder includes:
- A wide range of pre-designed canvases: headlines, contact forms, testimonials, pricing tables, FAQs, galleries, and more
- Clean, modern layouts that are mobile-friendly and easy to edit
- A searchable system so you can find what you need quickly
- Ongoing updates with new canvases and styles
Each canvas is fully customizable, so you can make it your own without breaking the layout or worrying about mobile responsiveness.
Who The Canvas Builder Is Perfect For
This tool is great for:
- Designers who create Showit templates or custom websites
- Business owners who want a faster, easier way to build pages
- Creatives who get stuck figuring out layout and structure
- Anyone who values quality design and a more efficient process
It is also helpful if you’re new to web design and need guidance on what sections a high-converting website should include. The canvases provide a framework that takes the guesswork out of it.
Ready to Try The Canvas Builder?
I use The Canvas Builder in nearly every template I sell and in semi-custom projects I take on. It helps me save time, stay organized, and create beautiful designs that are easy to maintain and update.
If you’re a Showit user who wants to streamline your workflow and build more confidently, this tool is 100 percent worth it.
Click here to explore The Canvas Builder
How I Use Flodesk to Automate Emails and Stay Connected with My Audience
Email is one of the most powerful tools in my business, and Flodesk is the platform I trust to handle it all. From welcome sequences to product launches, I use Flodesk to stay connected with my audience in a way that feels personal, on-brand, and beautifully designed.
It’s simple, intuitive, and built specifically for creative entrepreneurs who want their emails to look just as good as their websites.
Why I Chose Flodesk
Before switching to Flodesk, I tried other platforms that felt clunky, overly technical, or just plain uninspiring. I wanted something that made it easy to automate my email marketing without sacrificing design or user experience.
Flodesk checked every box:
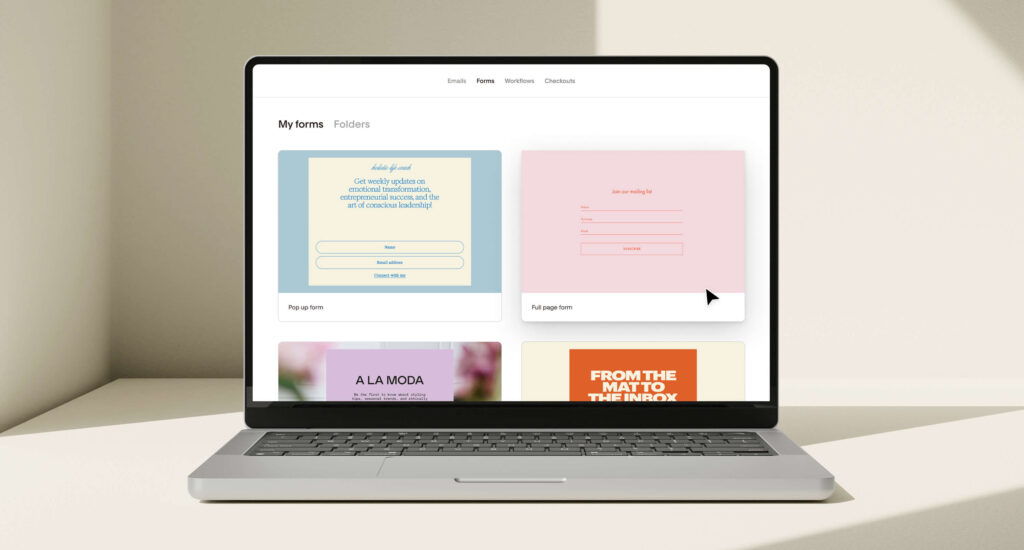
- Gorgeous, drag-and-drop email builder
- Easy-to-set-up workflows and automations
- Clean, modern opt-in forms
- A flat monthly fee (no matter how many subscribers you have!)
It was a no-brainer for me and has stayed one of my most used tools in the business.
How I Use Flodesk in My Business
1. Welcome Sequences That Build Connection
Every time someone downloads a freebie, purchases a product or course, or opts into my list, they’re added to a specific welcome sequence inside Flodesk. These automated emails introduce them to my brand, walk them through how to get the most out of their freebie, and gently introduce paid offers, or provide specific support for a purchased product.
Because I can design each email with my brand colors, fonts, and images, the experience feels cohesive and professional right from the start.
2. Product Launches and Promotions
Whenever I launch a new Showit template, mini-offer, or affiliate partnership, Flodesk is how I keep my audience in the loop. I can create branded, mobile-friendly emails in minutes and send them out to the right segments of my list.
I’ve found that clean design and strong visuals lead to higher open and click rates, and Flodesk makes that easy to achieve.
3. Regular Value-Driven Content
I also send out weekly or bi-weekly newsletters packed with tips, resources, and updates. With Flodesk, I can duplicate past layouts, plug in fresh content, and get a new campaign out quickly. It helps me stay consistent without starting from scratch every time.
My Favorite Flodesk Features
- Drag-and-drop email builder with beautiful templates
- Seamless automations and workflow setup
- Subscriber segmentation that’s easy to manage
- Clean, modern opt-in forms you can embed into any page
- Flat pricing, which means no surprise bills as your list grows
- Integration with platforms like Showit and Zapier
Why Flodesk Works So Well with My Business Model
Because my business involves both digital products and 1:1 services, I need a tool that supports both types of customer journeys. Flodesk allows me to:
- Set up simple nurture funnels for people who download free resources
- Segment buyers into follow-up workflows
- Send time-sensitive updates about launches or offers
- Deliver value while staying fully on-brand
Everything feels easy and elegant, which is exactly how I want my client and customer experience to feel.
Start Using Flodesk
If you’re tired of confusing email platforms and want something that feels clean, modern, and genuinely enjoyable to use, Flodesk is worth trying.
Click here to get 50% off your first year of Flodesk
(This is my affiliate link. If you sign up through it, I’ll receive a small commission at no extra cost to you. I only recommend tools I personally use and love.)
How Dubsado Runs My Entire Client Workflow From Inquiry to Invoice
Running a creative business means wearing a lot of hats; designer, project manager, customer service, and sometimes even therapist. One of the best decisions I’ve made to keep everything organized and professional is using Dubsado to manage my entire client workflow.
From the moment someone inquires to the final invoice and feedback form, Dubsado helps me stay on top of every detail without sending endless emails back and forth. It saves me hours each week and makes my clients feel supported from day one.
Why I Chose Dubsado Over Other CRM Platforms
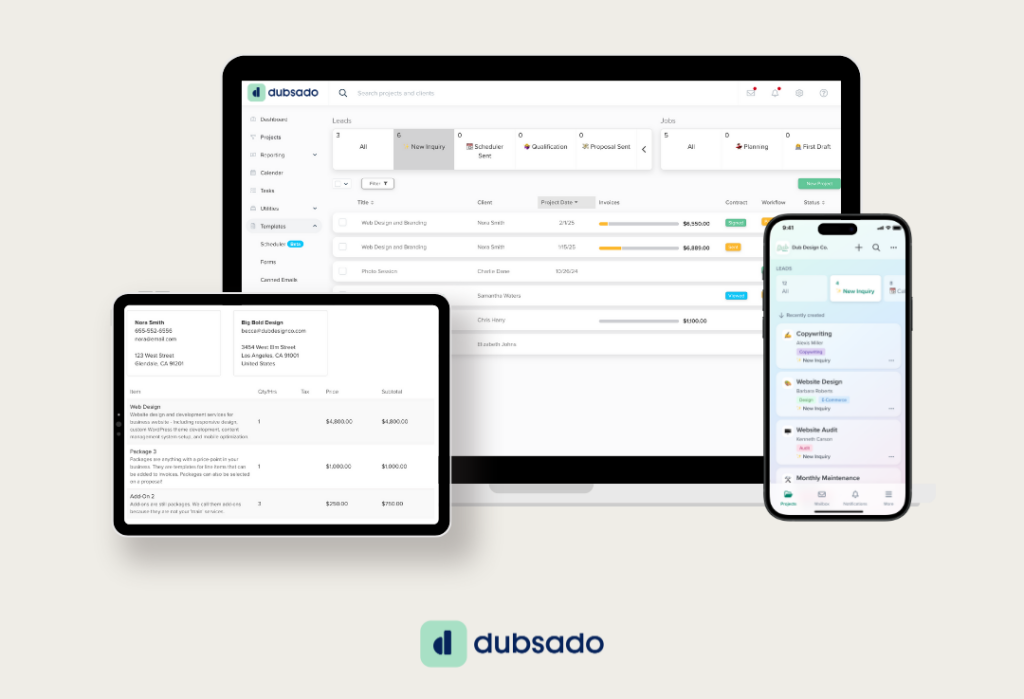
I tested a few client management tools before landing on Dubsado. Most of them either felt too rigid or too complicated. I needed something flexible enough for a creative business, but robust enough to automate contracts, forms, emails, and payments.
Dubsado hit that sweet spot. Here’s why I stuck with it:
- Custom workflows that run on autopilot
- Beautifully branded forms, proposals, and questionnaires
- Built-in invoicing and payment tracking
- Client portals for a professional, all-in-one experience
- Unlimited projects and clients under one flat fee
It quickly became one of my must-have tools.
How I Use Dubsado in My Business
1. Inquiry to Booking (Fully Automated)
When someone fills out my contact form, it triggers a Dubsado workflow that sends an email response, a discovery call scheduler, and a branded proposal with service options.
No manual follow-up. No awkward waiting. Everything is ready to go and tailored to their needs.
2. Onboarding and Welcome Kits
Once a client books, they automatically receive a contract, invoice, and welcome guide, all customized with my branding. These go out in a clean, consistent order, so I never miss a step or forget to send important info.
It also makes a great first impression. Clients often comment on how smooth and professional the process feels.
3. Project Forms and Communication
I use custom questionnaires, feedback forms, and progress check-ins throughout each project. Everything is stored inside their client portal so it’s easy to access and reference.
This helps me keep revisions on track, gather important info upfront, and reduce inbox clutter.
4. Offboarding and Final Wrap-Up
Once a project is complete, I send a final feedback form, a testimonial request, and a thank-you email through Dubsado. This makes the end of the project feel just as polished as the start.
My Favorite Features Inside Dubsado
- Fully customizable workflows
- Branded proposals, contracts, and forms
- Time tracking and to-dos built into each project
- Scheduler for calls, consultations, or review meetings
- Stripe and PayPal integration for simple payments
- Client portals to keep everything in one place
How Dubsado Supports My Template Shop
While I use Dubsado mainly for client work, I’ve also used it to support custom template installations and other one-time services. I can create separate workflows for each type of offer, so I never have to manually send the same email or checklist twice.
Try Dubsado in Your Business
If you’re a service provider, designer, or creative who manages clients, Dubsado is one of the best investments you can make. It turns your process into a system, so you can spend less time on admin and more time on what you actually love.
Click here to try Dubsado free and get 20% off your first month or year
(This is my affiliate link. If you sign up through it, I may earn a small commission. As always, I only recommend tools I trust and personally use.)
How I Use Kajabi to Host and Sell My Digital Courses
When it comes to selling digital products and creating a seamless course experience, Kajabi is my go-to platform. It’s where I host all of my online trainings, resource libraries, and private member content. What I love most about it is that everything, from product delivery to email marketing and payment processing, is housed in one place.
If you’ve ever felt overwhelmed trying to piece together multiple tools just to sell one offer, Kajabi simplifies everything. It’s all-in-one without feeling all-over-the-place.

Why I Chose Kajabi
I tried other course platforms that looked good on paper, but they often required complicated integrations or felt clunky on the user side. I wanted something that looked polished, supported my brand visuals, and gave my students a smooth, no-stress experience.
Kajabi stood out because it offered:
- A built-in website and blog if needed (I don’t personally use this feature)
- Simple product setup and delivery
- Multiple payment plan options
- High-converting landing page templates
- Checkout, email, and automation tools included
- A clean, modern learning experience for students
It allowed me to build offers that felt professional without outsourcing the tech.
How I Use Kajabi in My Business
1. Hosting Courses and Mini-Trainings
Kajabi is where I host any trainings or digital product libraries I want to feel more premium. I’ve used it for everything from mini-courses to full-scale templates and video walkthroughs.
Each course page is fully customizable, so I can match my fonts, colors, and tone perfectly. Students log in through a branded portal and get instant access to their content.
2. Creating Upsells and Bundles
One of my favorite features is the ability to create product bundles or offer upsells during checkout. For example, when someone buys a template, they might be offered a setup training or bonus strategy module as an add-on.
This helps increase order value and gives customers an even better experience.
3. Managing Customer Experience
Kajabi makes it easy for customers to access their purchases, update their info, and come back to content any time. I receive fewer support emails because everything is streamlined, and the user dashboard is intuitive.
Kajabi vs Other Course Platforms
There are lots of platforms out there for hosting courses; Teachable, Podia, and Thinkific, to name a few. They all have strengths, but for me, Kajabi offers the cleanest workflow and most brand-aligned experience.
I also love not having to duct-tape my systems together. With Kajabi, I don’t need separate tools for landing pages, checkout, and email (even though I however DO use a different tool for email, but you don’t have to). Everything talks to each other, which makes automation so much easier.
My Favorite Kajabi Features
- Drip content and course modules
- One-click upsells and custom thank-you pages
- Easy-to-use email campaigns and sequences
- Landing pages with built-in templates
- Mobile-friendly member portal
- Affiliate management and analytics
- Payment plan options for products
Should You Use Kajabi?
If you sell digital products, offer courses, or want to create a resource hub for your clients or customers, Kajabi is a great choice. It’s especially helpful if you want one platform that handles everything without constant plugin maintenance or tool-hopping.
It’s also ideal if you care about branding and want the user experience to feel elevated from start to finish.
Try Kajabi for Free
Kajabi offers a free trial so you can explore the platform, test the features, and start building your first product. You don’t need a ton of content to get started, just a clear offer and a desire to serve your audience well.
Click here to try Kajabi free for 30 days
(This is my affiliate link. If you sign up through it, I may earn a small commission. As always, I only promote what I genuinely use and love.)
How I Use ThriveCart to Sell Digital Products with Simple, High-Converting Checkouts
If you sell digital products and want a simple way to collect payments, deliver content, and boost your average order value, ThriveCart is one of the best tools out there. I’ve used it to sell templates, mini-offers, and digital downloads, and it’s consistently reliable, flexible, and easy to use.
I don’t need a full ecommerce platform for my business. I need something that works quickly, looks clean, and allows me to scale my offers without tech overwhelm. ThriveCart does all of that and more.

Why I Use ThriveCart Instead of WooCommerce or Shopify
A lot of designers default to WooCommerce because it integrates with WordPress, or Shopify because it’s well-known. But both of those platforms are built for physical product shops and require more setup, more maintenance, and more moving parts than I want to manage.
ThriveCart is simple. It’s made for digital products, online courses, and offers that don’t need a huge storefront or catalog. I can set up a product, create a checkout page, and start making sales the same day.
How I Use ThriveCart in My Business
1. Selling Digital Downloads and Templates
When someone buys a Showit template or resource from my shop, they’re taken to a ThriveCart checkout page. The process is fast, branded, and user-friendly. After payment, customers receive their download link automatically, no delays, no follow-up emails needed.
2. Creating Order Bumps and Upsells
One of the best parts of ThriveCart is how easy it is to increase your average order value. I regularly include an order bump on the checkout page, like a matching Canva kit or setup checklist, and often offer a post-purchase upsell with a mini-training or workbook.
This lets me serve my customers more fully while also increasing revenue from each sale.
3. Managing Affiliates
ThriveCart has a built-in affiliate system that makes it easy to reward others for promoting my products. I can approve affiliates, set commission rates, and track performance without using a separate platform. It’s all in one place and works smoothly behind the scenes.
My Favorite ThriveCart Features
- One-time payment with lifetime access (no ongoing fees)
- Beautiful, customizable checkout pages
- Automatic product delivery via email or redirect
- Order bumps and upsells built into the checkout flow
- No transaction fees, so you keep more of every sale
- Affiliate center for managing referrals
- The ability to create gorgeous product pages on Showit, and then link in buttons, instead of automatically generated Woocommerce pages
- Integration with Stripe, PayPal, and email tools like Flodesk and Kit
Why I Recommend ThriveCart for Creative Businesses
If you sell templates, digital downloads, mini-courses, or services with set pricing, ThriveCart is an ideal solution. You don’t need a full ecommerce store to make money. You just need a fast, reliable checkout and a way to deliver your product, ThriveCart makes that easy.
It works seamlessly with platforms like Showit, so you can link directly from a button to your checkout without creating unnecessary friction for your customer.
Try ThriveCart
ThriveCart is a one-time purchase with no monthly subscription and no transaction fees, which means you keep more of every sale. If you’re looking for a way to simplify your checkout process, boost revenue with upsells, and avoid ongoing platform costs, this is one of the smartest tools you can add to your business.
Click here to explore ThriveCart
(This is my affiliate link. If you sign up using it, I’ll receive a commission at no extra cost to you. Thank you for supporting my business.)
How I Use Workflow.design to Plan, Organize, and Stay Focused in My Business
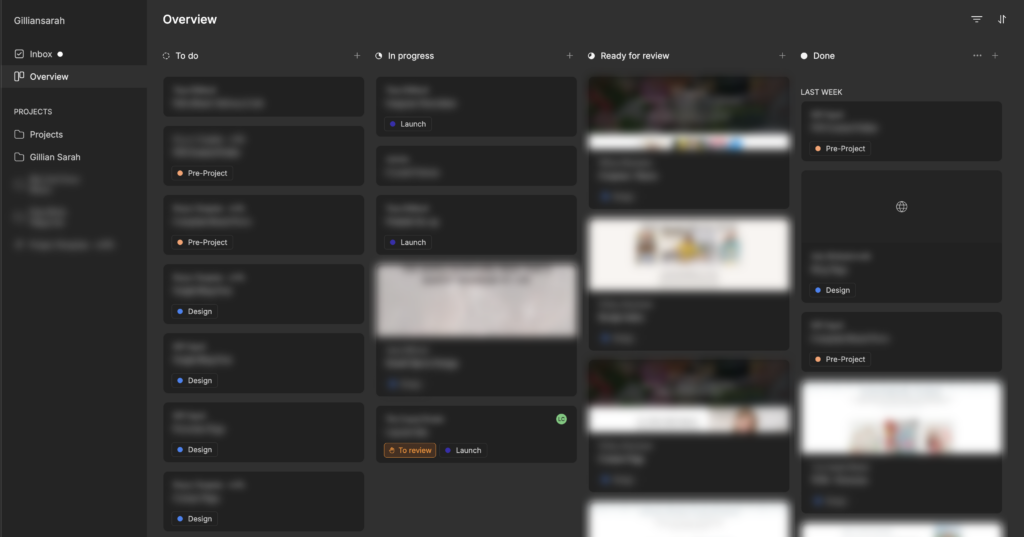
Workflow.design is the heart of how I manage my business behind the scenes. It’s more than a planner, it’s where I organize launches, track tasks, plan content, and most importantly, manage client projects from start to finish.
Why Workflow.design Works So Well for Me
I’ve tried a lot of productivity tools over the years, from Trello to ClickUp to Markup. While they each had strengths, they often felt too complex or too open-ended or mainly too expensive. I didn’t want to build a system from scratch. I wanted a space that was already designed for how creatives actually work.
Workflow.design is beautifully structured, easy to use, and built specifically for creative business owners. It blends the structure of a planner with the flexibility of a journal, so you can organize your work and your ideas in one place. It’s my old favorite tools all had a baby together, the layout of Trello, with the functions of Clickup, with Markup built into it, totally dreamy!
My Favorite Feature: The Client Portal
The most important thing I use Workflow.design for is managing client projects. Every client gets a dedicated project board where I can outline tasks, timelines, and deliverables.
But the real magic is in how I collect feedback.
I can embed live website drafts directly into a task, and my clients can click anywhere on the draft to leave notes and comments. It’s like having a shared whiteboard, but smarter. Instead of messy email threads or vague revision notes, everything is visual, organized, and actionable.
This has completely transformed how I handle revisions. Clients feel more involved, and I can respond faster because I know exactly what needs to change. It saves hours every week and keeps the project moving forward without confusion.
Other Ways I Use Workflow.design
Weekly Planning
Every Monday, I outline my top priorities and break them into daily tasks. This helps me stay focused and avoid getting pulled in too many directions.
Offer and Launch Mapping
When I’m planning a new template, service, or product launch, I use the built-in strategy pages to map out the steps, content, and timeline in one place.
Creative Idea Capture
There’s a section for capturing those random late-night ideas and content prompts. I jot everything down there so I can revisit and act on them when I’m ready.
Reflection and Progress Tracking
At the end of each week, I review what worked, what didn’t, and where to focus next. It helps me move with intention instead of just reacting.
My Favorite Features in Workflow.design
- An excellent tool for feedback and approvals
- Live website links for markups
- You can see the exact area a client has left a comment
- Super easy to change a task status
- You can assign tasks to clients
- An area within each task to have a discussion
- More of a mood board layout than a spreadsheet for easy visuals
- Goal setting and progress tracking
- Minimalist design that keeps you focused
Why I Recommend Workflow.design
If you’re a service provider, designer, or creative entrepreneur who juggles multiple projects, Workflow.design is a game changer. It’s clean, easy to use, and designed to support the way creatives think. Whether you’re planning offers or collecting client feedback, it helps you work smarter without needing complicated systems.
Try Workflow.design for Yourself
Workflow.design is perfect if you want a planning system that aligns with your creative brain. You don’t need to be a productivity pro to use it, and you don’t have to build anything from scratch. Just open it, get clear on your goals, and start moving forward.
Click here to explore Workflow.design
(This is my affiliate link. If you sign up using it, I’ll receive a commission at no extra cost to you. You’ll also get $20 off your subscription. I only recommend tools that I’ve personally used and found valuable in my own business.)
How I Use Zapier to Connect Kajabi, ThriveCart, and Flodesk Without Lifting a Finger
Zapier is the quiet powerhouse behind many of my business systems. It connects my favorite platforms, like Kajabi, ThriveCart, and Flodesk, and makes sure that everything runs smoothly, without me needing to manage each step manually.
It handles the little things that would otherwise take up my time: tagging people correctly, triggering workflows, and delivering the right content at the right moment. It works in the background, but it makes a huge difference in how professional and streamlined my business feels.
How I Use Zapier in My Business
1. Linking Kajabi to Flodesk
When someone enrolls in one of my Kajabi courses or trainings, Zapier sends their information to Flodesk and adds them to a specific segment. That segment then triggers a tailored email sequence, which might include onboarding support, bonus resources, or an upsell offer.
This helps me deliver a better experience and follow up without having to do anything manually.
2. Connecting ThriveCart Purchases to Flodesk
Zapier also connects ThriveCart to Flodesk. When a customer buys a template, mini-course, or digital product, their purchase information is passed directly to the correct Flodesk workflow. From there, they receive exactly what they need—whether that is a welcome email, a product delivery link, or bonus support content.
3. Triggering Support Emails Based on Customer Actions
Some purchases kick off an entire support chain. For example, if someone purchases a more complex offer or bundle, Zapier starts a Flodesk workflow that includes onboarding tips, helpful how-to guides, and personal follow-up. This keeps my customer experience high-touch without adding more work to my plate.
My Favorite Things About Zapier
- Connects all my core platforms without any code
- Automates email segmentation and tagging
- Ensures customers always get the right product or freebie
- Reduces manual admin and human error
- Helps me support people better while doing less behind the scenes
Try Zapier to Simplify Your Systems
Zapier is perfect for creative business owners who want to make their platforms work together without juggling multiple tabs or repeating the same steps over and over. Whether you’re delivering freebies or running full product launches, Zapier makes sure every tool stays in sync.
How I Use Calendly to Book Calls Without the Back-and-Forth Emails
Scheduling calls used to be one of the most frustrating parts of running my business. Between time zones, email delays, and trying to find a slot that worked for everyone, it took more effort than it should have. Once I started using Calendly, that all changed.
Calendly lets me create custom scheduling links for discovery calls, client check-ins, and project meetings. I send the link, they choose a time, and we’re both instantly booked with confirmation emails and reminders. It saves time, eliminates confusion, and makes the process feel smooth and professional.
Why I Use Calendly Over Other Scheduling Tools
There are lots of booking platforms out there, but Calendly is clean, easy to use, and integrates well with the rest of my tools. It connects with my calendar, avoids double bookings, and lets me set rules around when I’m available.
It also works beautifully alongside Dubsado and Zapier. I can embed my Calendly link in a Dubsado email or use a Zap to trigger a workflow once a call is booked.
How I Use Calendly in My Business
1. Discovery Calls and Consultations
When a potential client wants to chat, I send them a Calendly link to book a time that works for both of us. They get confirmation emails, and I get all the call details without needing to manually manage a thing. It will automatically generate a Zoom meeting link for our call.
2. Ongoing Client Check-Ins
For longer projects, I’ll include a Calendly link in my onboarding materials or client portal. This gives clients the freedom to schedule feedback calls or progress meetings on their own schedule.
3. Collaborations and Interviews
I also use Calendly when someone wants to collaborate, host me for a podcast, or ask questions about my templates. It helps me keep all those meetings organized and in one place.
My Favorite Calendly Features
- Syncs with Google Calendar to prevent double bookings
- Custom availability for different types of calls
- Automated email confirmations and reminders
- Buffer time before and after appointments
- Custom form questions to gather information before the call
- Integration with Zoom, Dubsado, and Zapier
Why I Recommend Calendly
If you’re spending more than a few minutes scheduling each call, Calendly will immediately simplify your life. It helps you set boundaries, stay organized, and reduce the admin side of client management. Whether you offer services, discovery calls, or digital strategy sessions, this tool makes the process feel seamless for you and your clients.
Try Calendly
Calendly has a free plan that’s perfect for basic scheduling, with paid upgrades for more advanced features and automation. It’s one of those tools that pays for itself in time saved and professionalism gained.
How I Use Canva to Create On-Brand Graphics in Minutes
Canva is one of those tools that I use so often, I almost forget how powerful it really is. From social media graphics to lead magnets, mockups, and client-facing resources, Canva helps me stay visually consistent across every platform, without needing Photoshop or complex software.
I use Canva Pro so much in my business. It’s fast, flexible, and packed with features that make content creation feel effortless.
Why I Use Canva Pro (Not Just the Free Version)
The free version of Canva is a great starting point, but Canva Pro unlocks all the features I rely on most. For me, it’s worth every penny because it allows me to:
- Store my brand fonts, logos, and colors in one click
- Access thousands of premium templates, photos, and elements
- Resize designs instantly for different platforms
- Create custom folders and stay organized across projects
- Download transparent PNGs and animated graphics
Whether I’m designing a carousel post, building a presentation, or putting together a workbook for a digital offer, I can do it all in Canva, and I don’t need a design degree to make it look good.
How Canva Fits Into My Business
1. Social Media Content
Canva is where I create all of my Instagram posts, Stories, and Pinterest pins. I have pre-built templates that match my brand so I can create a full week of content in under an hour.
2. Lead Magnets and Freebies
I design all my freebies, like checklists, planners, and PDF guides, inside Canva. The drag-and-drop layout makes it easy to keep everything on brand, and I can duplicate templates to quickly spin off new resources.
3. Client and Course Materials
Whether I’m preparing a proposal, building a mini-course workbook, or sharing branding tips with a client, I use Canva to design every piece. It helps me deliver materials that look professional and polished.
4. Mockups and Visuals for Templates
When I launch a new Showit template, I use Canva to create styled mockups, preview graphics, and promotional assets. These visuals are essential for making my sales pages and product listings stand out.
My Favorite Canva Pro Features
- Brand Kit for fonts, logos, and colors
- Magic Resize to create multiple versions of a graphic instantly
- Transparent backgrounds for logo and product exports
- Custom templates and folders for organized workflow
- Access to premium photos, icons, and graphics
- Content planner for scheduling directly from Canva (super helpful for quick posts)
Tips for Getting the Most Out of Canva
- Build a few reusable templates for your most-used formats (social posts, PDF layouts, slide decks)
- Keep your designs consistent by using your Brand Kit and sticking to a visual hierarchy
- Use folders to organize content by offer, platform, or client
- Take advantage of animation features if you want to stand out on social media or add movement to presentations
Ready to Try Canva Pro?
Canva Pro makes it easy to create stunning, on-brand visuals without the stress. If you’re designing your own content or working with clients, it’s one of the most flexible and beginner-friendly tools out there.
How I Use Creative Market to Elevate My Branding and Design Projects
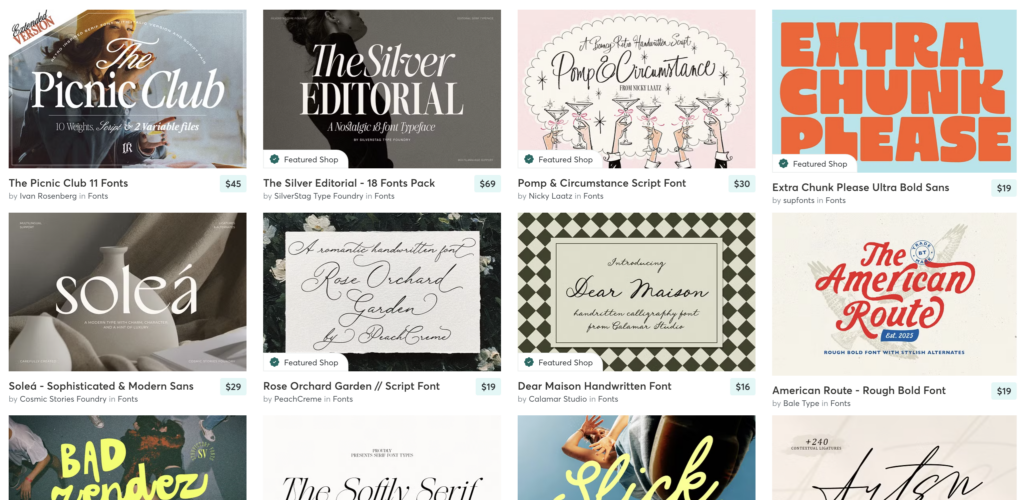
Creative Market is one of my go-to resources when I want to take a design project from good to gorgeous. Whether I’m building a new Showit template, updating visuals for a product launch, or creating branded client materials, I turn to Creative Market for high-quality assets that save me time and make my work look even better.
It’s a curated marketplace full of fonts, graphics, templates, mockups, and digital elements, basically everything a designer could dream of. And the best part is, you get to support independent creators while building your own beautiful brand.
Why I Keep Coming Back to Creative Market
There are a lot of design resources out there, but what sets Creative Market apart for me is the variety and quality. Every time I browse, I find fresh inspiration and beautiful, thoughtfully designed assets that I can plug right into my workflow.
It’s especially helpful when I want to:
- Add unique flair to a Showit template
- Upgrade typography with elegant or playful fonts
- Create scroll-stopping promo graphics and mockups
- Save time on custom illustrations or icons
- Keep my design library fresh without starting from scratch
How I Use Creative Market in My Business
1. Fonts and Typography
Typography plays a huge role in how a brand feels. I often source premium fonts from Creative Market to use in my template designs and client work. They help create a unique look that stands out without being overused or generic.
2. Mockups for Sales Pages and Social Media
When I launch a new product or template, mockups are essential for showing off the design. I use laptop, phone, and print mockups from Creative Market to create polished, branded visuals for my product pages, Pinterest graphics, and social content.
3. Graphics and Illustrations
From subtle background textures to bold hand-drawn elements, I use illustrations from Creative Market to add extra personality and style to both my website and client projects. These little details make a big impact.
4. Canva Templates and Design Packs
Creative Market also has beautiful pre-made Canva templates that I occasionally use or modify to create things like workbooks, guides, and social posts. They’re a great time-saver and a solid option if you want something polished fast.
Tips for Using Creative Market Strategically
- Follow your favorite creators so you can easily browse their newest uploads
- Purchase font families with multiple weights and styles for more design flexibility
- Use license filters to make sure you’re choosing commercial-use products and that your fonts have a web license
- Start a folder with go-to assets so you’re never starting from scratch
Why I Recommend Creative Market
If you’re a designer or creative entrepreneur, Creative Market is a must-have in your toolkit. It helps you save time, get inspired, and deliver elevated designs that look and feel completely custom. Even one new font or mockup set can transform a template, landing page, or offer launch.
Explore Creative Market
Creative Market is free to browse, and you can start building your library right away. Whether you’re refreshing your brand, designing your next digital product, or just want to play with something new, it’s full of assets that will help your work stand out.
Click here to explore Creative Market
My Actual Tech Setup: The Tools That Keep My Creative Business Running
Behind every smooth-running business is a solid tech setup. While I rely on software and systems to manage the digital side of things, the physical tools I use every day make a big difference in how comfortably and efficiently I work.
This is the exact setup I use in my home office to stay productive, create content, and deliver a seamless client experience.
Primary Computers
- MacBook Pro (16-inch, M chip)
This is my main machine when I’m working on the go or switching between rooms. It’s fast, quiet, and handles everything from design work to video editing without slowing down. - iMac Pro (27-inch desktop) – now retired from Apple
This is my in-office powerhouse. I use it for heavier design sessions, editing content, and when I want to stay in deep focus mode at my desk.
Monitors, Docking, and Desk Setup
- Computer monitor docking station with USB ports and charging station
I use this to lift my computer to eye level while keeping cables, chargers, and tools tucked away. It keeps my space clean and functional. - FlexiSpot standing desk
I switch between sitting and standing throughout the day. This has helped with energy levels and posture, especially during longer creative sessions.
Accessories and Workflow Tools
- Apple Magic Keyboard
Clean, responsive, and easy to pair with all my devices. - Logitech MX Master 3S Mouse
Perfect for design work. The scroll and ergonomic grip make it one of my favorite tools. - AirPods Pro
I use these for client calls, voice recordings, and quiet focus sessions. They connect quickly and help reduce distractions. - iPad Pro with Apple Pencil
Ideal for sketching layouts, creating digital notes, or editing visuals on the go. - reMarkable tablet
I use this for note-taking, outlining ideas, and brainstorming without distractions.
Content Creation Gear
- Canon 80D camera
This is my go-to for high-quality photography and video content. I use it to shoot both marketing visuals and course material. - Tripod
A must-have for stable, consistent video or product shots. - Studio lights and ring light
I rotate between these depending on what I’m filming. The ring light helps with quick Zoom calls or Lives, while the studio lights give me better control for video content or photo shoots. - Blue Yeti microphone
Clear, crisp audio for voiceovers, screen recordings, and any kind of content that needs to sound professional.
Why This Setup Works for Me
Everything here is chosen to support the work I do daily, whether that’s working with a custom client, designing a new template, editing content, hosting a client call, or planning out my next launch. I don’t believe in adding tech just to have it. I choose tools that feel good to use and help me work better.
This setup allows me to move between creative, strategic, and client-facing work without interruption. It keeps me in flow, helps me deliver high-quality results, and creates a workspace I actually enjoy being in.
Build a Business That Works for You
There’s no one-size-fits-all approach to running a creative business. But having the right tools in place can completely change how you show up, serve your clients, and scale with ease.
This tech stack didn’t come together overnight. It’s been shaped by trial and error, real client experience, and a whole lot of figuring things out on the go. Every tool I’ve shared here has earned its place by helping me work smarter, stay organized, and deliver a more polished and intentional experience, both for myself and for the people I serve.
If you’re building or refining your own business setup, I hope this post gives you clarity, inspiration, and a starting point. You don’t need every tool on this list, but the right combination for you will feel like taking a deep breath in your business.
Leave a Reply


Are You A Designer?
Or even just looking for something a little bit different?
Snag 10 Free Showit Canvases – Your Creative Jumpstart Awaits!
PLEASE COMMENT BELOW