NU


How to Add LTK Links to Your Blog Posts: A Step-by-Step Guide
Monetising your blog with LTK affiliate links is a great way to earn passive income while sharing your favourite products with your audience. Whether you are new to LTK or looking for a more effective way to integrate your links, this guide will walk you through three simple methods to add LTK links to your blog posts.
By the end of this tutorial, you will know how to:
- Add direct LTK links within your blog content
- Create shoppable widgets to display multiple products
- Use the boutique widget to keep your product recommendations updated
Let’s get started.
What is LTK and How Does It Work?
LTK (formerly known as LIKEtoKNOW.it) is an affiliate marketing platform that allows content creators to earn commissions by linking to products from partner retailers. When a reader clicks on an LTK link and makes a purchase, you earn a commission on the sale.
Integrating LTK links into your blog posts makes it easier for readers to shop your recommendations, helping you drive more clicks and sales.
Method 1 – Adding LTK Links Directly to Blog Content
One of the simplest ways to include LTK links is by embedding them directly within your blog content. This method is highly effective because readers are more likely to click on links naturally integrated into the text.
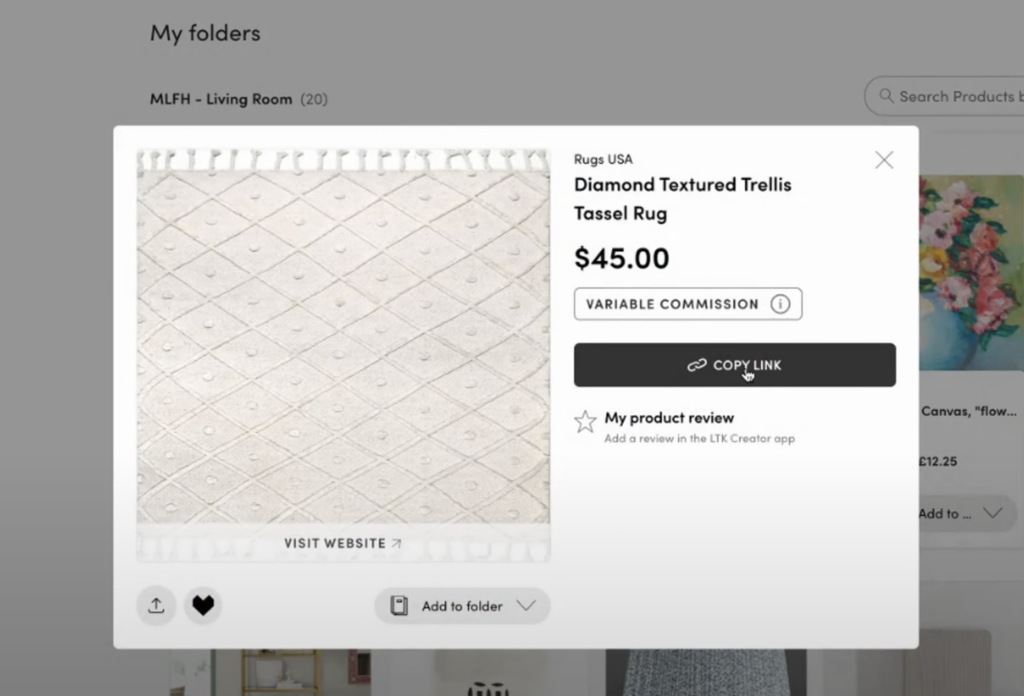
Step 1 – Find Your LTK Link
- Log in to your LTK Creator Dashboard.
- Navigate to the Products section and locate the item you want to link.
- Copy the affiliate link for that product.
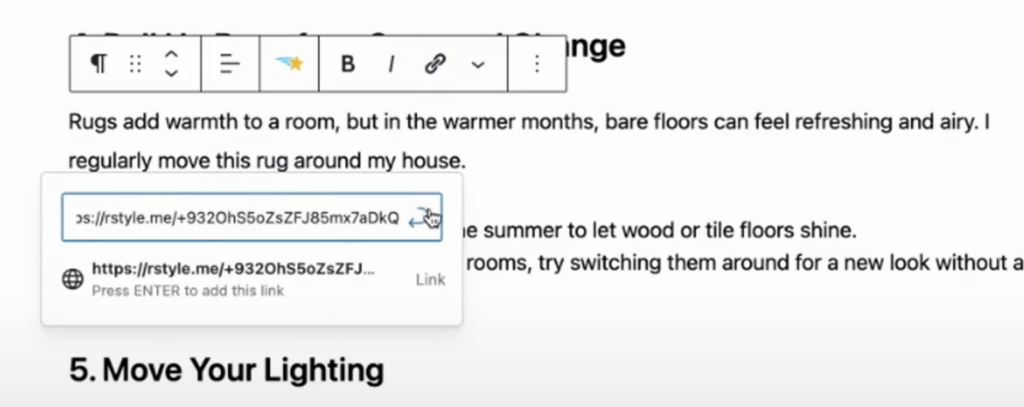
Step 2 – Insert the Link Into Your Blog Post
- Open the blog post where you want to add the link.
- Highlight the relevant text (for example, “this coffee table”).
- Click the Insert Link button in your blog editor.
- Paste the LTK link and select Open in a New Tab for a better user experience.
- Mark it as a nofollow link to comply with SEO best practices.
Step 3 – Check the Links
Once you have added all your affiliate links, preview the post and test the links to ensure they open correctly.
Method 2 – Adding an LTK Shoppable Widget
A shoppable widget is a great way to showcase multiple products in one section of your blog post. This method is ideal for posts featuring home decor, fashion looks, or product recommendations.
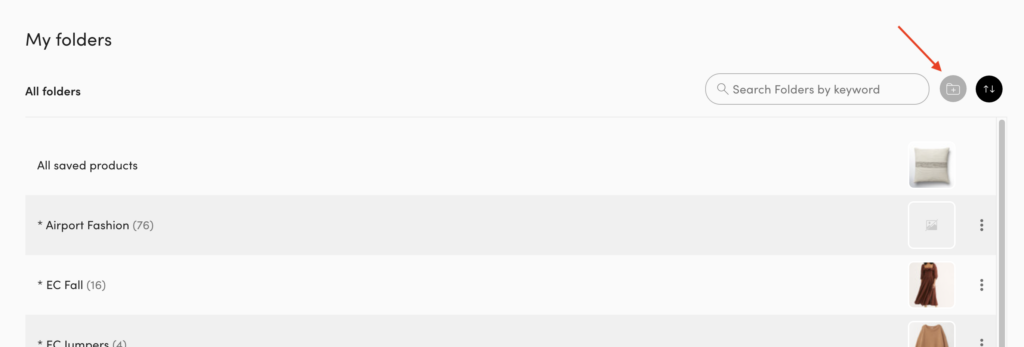
Step 1 – Create an LTK Folder
- Go to your LTK Dashboard and navigate to the Folders section.
- Create a new folder and add all the products you want to feature in the blog post.
- Once your folder is ready, move on to creating the widget.
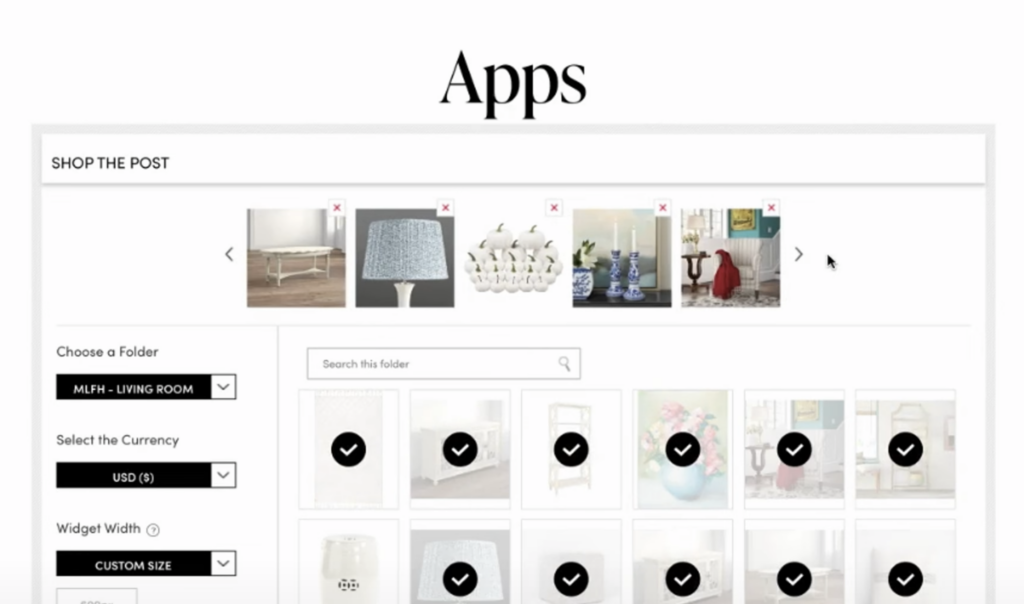
Step 2 – Generate a Shoppable Widget
- Under the Tools section in LTK, select Shop the Post Widget.
- Choose the items you want to include in this specific post.
- Adjust the layout and display settings, such as showing brand names and prices.
- Select WordPress as your platform if you have the LTK plugin installed.
- Click Copy Code to grab the shortcode for your widget.
Step 3 – Insert the Widget in Your Blog Post
- Open your blog post editor and scroll to the section where you want to place the widget.
- Add a Shortcode Block (if using WordPress) or paste the code directly if using a different platform.
- Preview your post to ensure the widget displays correctly.
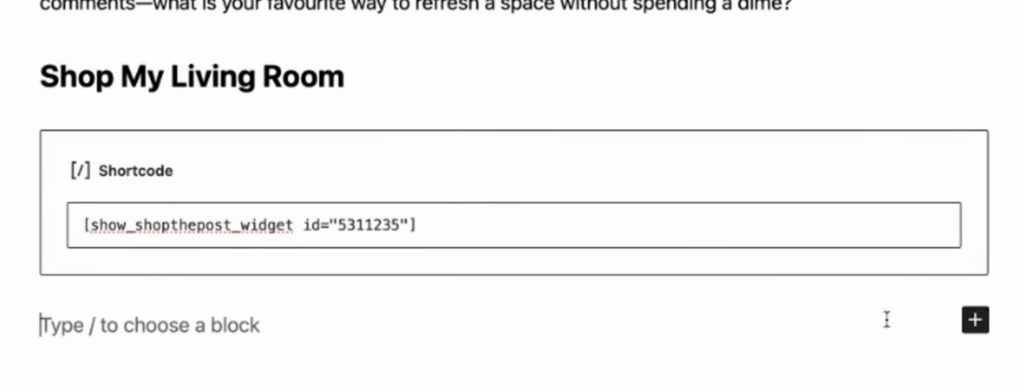
Best Placement Tip:
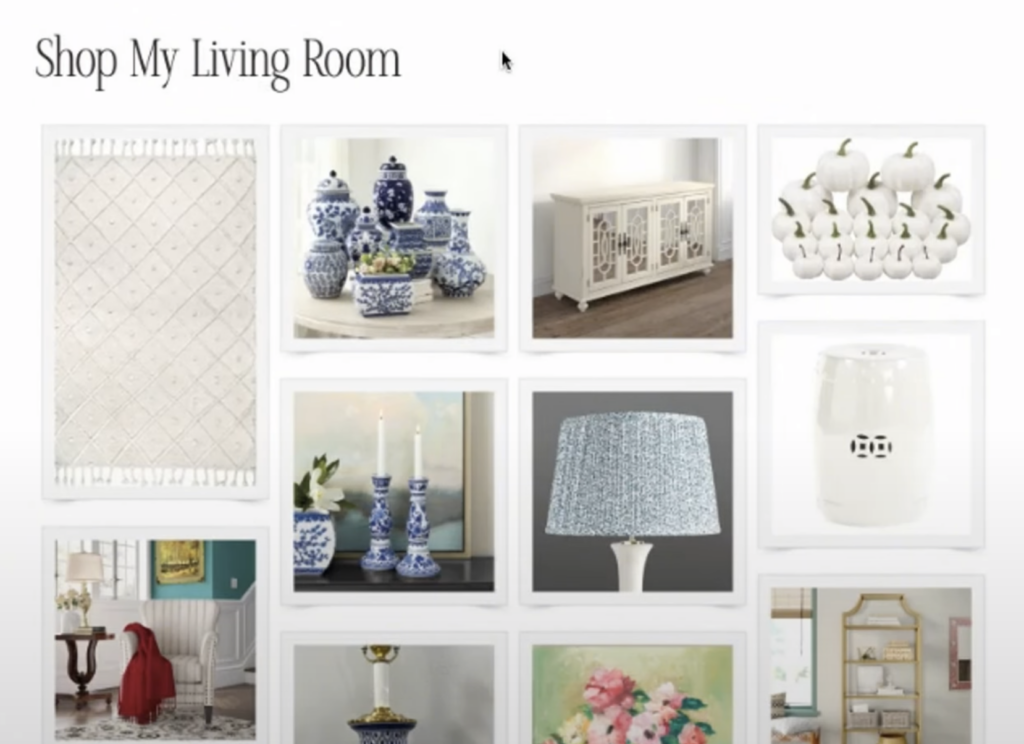
Add shoppable widgets toward the bottom of your blog post under a section header like Shop My Living Room to avoid disrupting the reading experience.
Method 3 – Using the Boutique Widget for Automatic Updates
If you frequently update your product recommendations, the boutique widget is a great option. This widget dynamically updates whenever you add new products to a specific LTK folder.
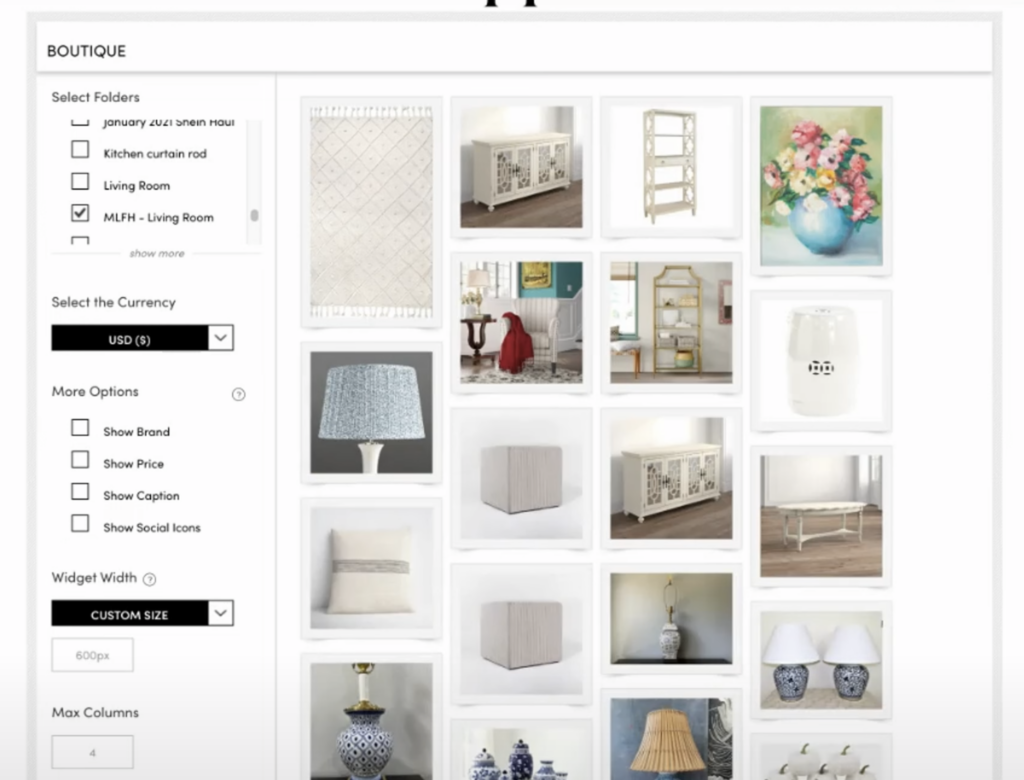
Step 1 – Create a Boutique Widget in LTK
- Navigate to the Tools section in your LTK Dashboard.
- Select Boutique Widget from the available options.
- Choose the LTK folder you want to feature in the widget.

Step 2 – Customise the Widget Display
- Adjust the number of columns to control how many items appear in a row.
- Set the maximum number of products to display.
- Customise the width to match your blog’s layout.
- Enable show brand and show price on hover for better visibility.
Step 3 – Embed the Boutique Widget in Your Blog
- Click Copy Code and go back to your blog post.
- Paste the code in a Shortcode Block or an HTML block.
- Save and preview your post to check if the widget updates properly.
Pros and Cons of the Boutique Widget:
- Pro: It updates automatically with new products from your folder.
- Con: It can appear cluttered and may not blend as well with structured blog content.
Best Practices for Adding LTK Links to Your Blog
- Use a mix of text links and widgets for better engagement.
- Avoid overloading your post with links to maintain a good reader experience.
- Regularly update your links to ensure they remain relevant and drive conversions.
- Test your links before publishing to avoid broken or incorrect redirects.
By following these methods, you can seamlessly integrate LTK links into your blog posts and optimise your affiliate earnings. Whether you prefer text links, shoppable widgets, or boutique widgets, each method has its benefits depending on your content style.
Watch the full tutorial below for a visual walkthrough.
Let me know in the comments which method works best for you or if you have any questions. Happy blogging.

PLEASE COMMENT BELOW