Lead Magnet Delivery Techniques Using Flodesk
Table of Contents
ToggleSharing is caring!
Reading Time: 4 minutes


Lead magnet delivery can be a pain if you’re not using the right platform. Enter Flodesk. I love it and I know you’ll love it too! Here are lead magnet delivery techniques to try using Flodesk!
Switched to Flodesk recently? Congratulations, you’re using one of the most powerful email marketing platforms in the business. If you’re growing your email list with Flodesk, you’re probably wondering what kinds of strategies to implement for a successful email marketing campaign. Don’t worry, I’m here to help you deliver a marketing message that sticks to your ideal clients.
Grab a 30-day free Flodesk trial here
What is a Lead Magnet?
Offering a lead magnet is one of the fastest ways of growing an email list. A lead magnet is a file that you offer for free in exchange for an email address. To compel people to subscribe to your mailing list, you have to offer something in return, like free content. The freebie should be tempting enough to entice your readers to give up their email address because you know, no one likes spammy content.
People who give their email address in exchange for an incentive are ripe for marketing. These are the people that don’t need much convincing to buy whatever it is that you are selling.
The lead magnet often comes in a form of a pop-up page or an ad that people will click on. Once clicked, the page will take viewers to a landing page that provides more details about the offer and a field to leave their email addresses in. After submitting the form, they’ll receive an email confirming their subscription + the access to the freebie.
Now that you know what a lead magnet is, let’s start creating a lead magnet using Flodesk:
How to Create a Lead Magnet Using Flodesk
Figure Out the Giveaway
The first step in creating a lead magnet is to figure out what kind of freebie to offer to potential subscribers. Again, the incentive could be in a form of free content such as:
- An ebook
- A weekly newsletter
- A discount code/voucher
- A special sign-up promo
- A .PDF guide
- A short email course
The better the incentive, the higher the chances of getting more email addresses, which will be useful for future promotions.
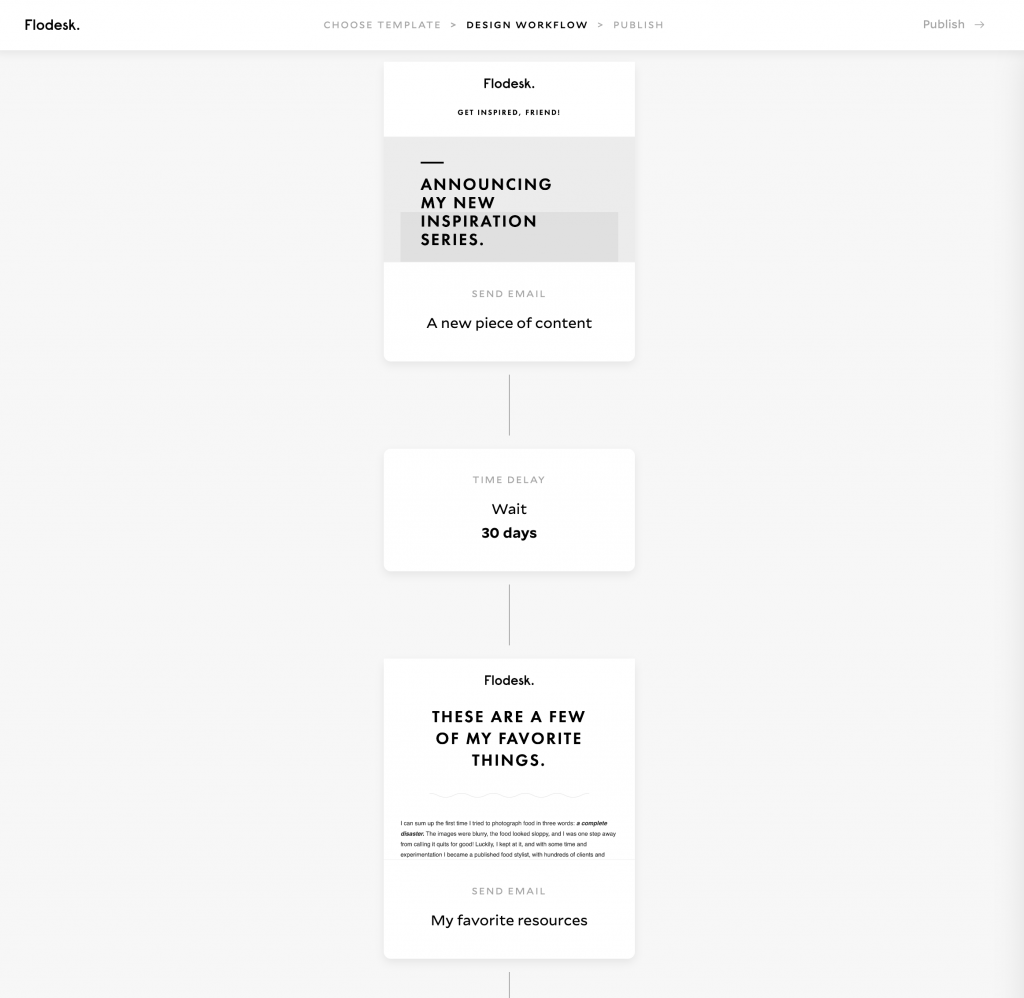
Create a Workflow
On Flodesk, click “workflows” on the top menu, choose “Create New” then “Start from Scratch.” Click “Add Trigger,” and you'll be given different options to begin the workflow. Under “Begin this workflow,” choose “A subscriber gets added to a segment.” Once the segment has been chosen, you can start designing your own form.

Content + Image
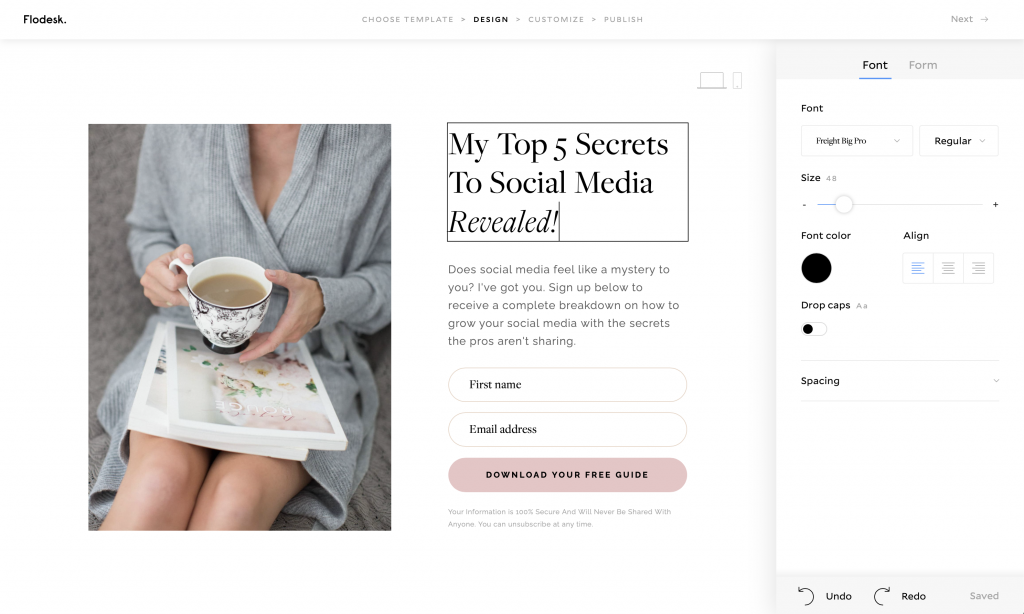
The content is very important, it keeps potential subscribers intrigued so be creative. Create a benefit-based title so people will know what's in it for them. Also, the design of the lead magnet page is just as important, it should look consistent with your brand. Use a beautiful cover then complement it with fabulous copy and you're good to go!
Tips:
- Use an attention-catching headline
- Create a short description of the freebie (benefits, please!)
- A few fields to fill out (not too many to avoid putting potential subscribers off)
- Be clear, let them know what they are signing up for
Since you’re using Flodesk, creating a lead magnet email is easy. You can do this in under two minutes, I promise.
Using a template? On Flodesk, just click the sections to change the font style and colour schemes so the form is consistent with your brand. Add the text and photos + a preview of your Instagram feed – if there’s one – and you’re done.
If you’re building a lead magnet from scratch, don’t forget to add your contact deets and the “unsubscribe” button below the email (very important!) Pre-made forms have the unsubscribe link built-in so you don’t need to create one. But forms made from scratch, you’re required by law to add the unsubscribe link otherwise, you’re breaking the law.
I highly suggest adding a freebie preview because forms with a sneak peek are more likely to attract more people. And once your readers download the freebie, they're less likely to hit the unsubscribe link. You could either add a link to your lead magnet or just add the file directly, totally up to you.
When you’re done putting everything together, hit the “Finish” button and you’re ready to publish your workflow.

Publishing the Form
The final step in creating a lead magnet form is to publish it and embed it on your website. By embedding the form on your website, people could sign up for the freebie when they visit.
To embed the form on your website, choose “Forms” and select “Embed”. You’ll get two code snippets, one for the header and another for the inline. Just copy and paste the code to every website page, just above the closing </head> tag.
The inline code is the code for the form. It won’t appear unless the header code has been added. You can add this code anywhere on your website where you want the form to appear. For instance, if you want the form to appear on your homepage, add the code to your homepage.
To add the inline code, you can use a page builder like Elementor or WordPress editor. If you’re using WP editor, you have to switch to the “text” tab to add the code. When you hit the text tab, you’ll see a bunch of codes, just add the inline code, hit save, and you’re done!
And that’s it, you can start growing your email list as soon as your form is published. Flodesk makes everything easier so all you have to do is to perfect the copy and take it from there. We hope that you found this guide useful to your email marketing campaign.
Grab a 30-day free Flodesk trial here
Most Popular Posts:
Sharing is caring!
[…] Opt-in freebies […]
[…] people to fill out the form will depend on what incentive or benefit you’re offering. A freebie like a digital product, a small discount, a short email course, etc., are some of the most common […]